Canning Lids and Bands: Why You Replace Lids Every Time
Learn how the two-piece canning lid system works, why flat lids must be replaced each batch, and how bands seal, vent, and store safely.
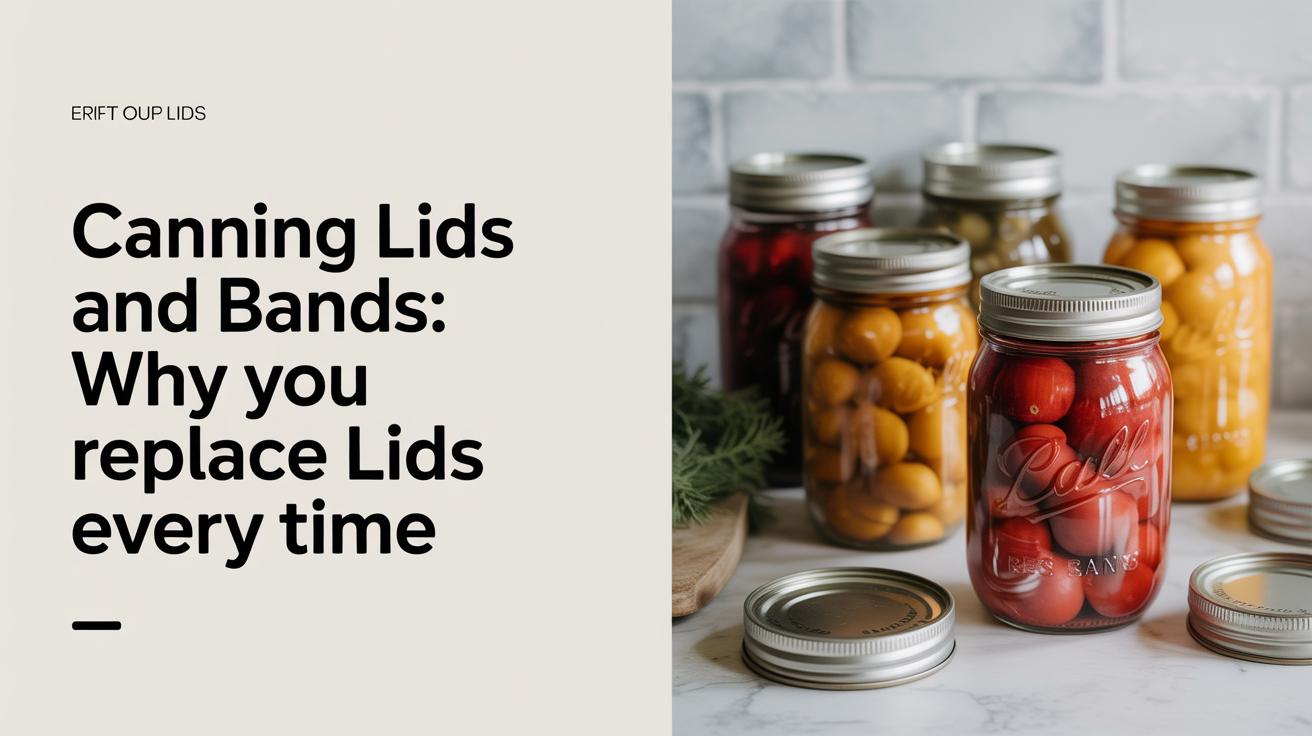
Pick up a box of canning lids and you'll notice two separate pieces rattling around inside: a flat disc and a threaded ring. That's not a packaging quirk. Each piece has a specific job, a specific lifespan, and specific rules for how tight to screw it down. Getting those details right is one of the cheapest, most reliable ways to protect a whole batch of jars.
This guide breaks down how the two-piece system works, what happens inside the jar as it seals, and the one rule that trips up nearly every beginner: you cannot reuse flat lids.
What the Two Pieces Actually Are
The standard home canning lid is a two-part system made up of a flat metal disc and a separate screw band. They look like they belong together, and during processing they do work together, but they are not the same tool and should not be treated identically.
The Flat Lid
The flat disc is the part that actually seals the jar. Look at the underside and you'll see a ring of rubberized compound molded around the inner edge. That compound is what makes contact with the jar rim and forms the airtight barrier that keeps your preserved food safe.
This sealing compound is engineered for a single use. During processing, heat softens it just enough to conform to the glass rim. As the jar cools, the vacuum forming inside pulls the lid downward, and the compound hardens in that pressed-down position. The result is a seal. But the compound has now been compressed, stressed by heat, and shaped to one specific jar rim. Using it again means asking a once-used gasket to perform the same job, and the risk of failure goes up significantly.
The USDA and the National Center for Home Food Preservation are clear on this: use new flat lids for every canning batch. Reusing flat lids is not a tested practice, and an unsealed jar may not always look or smell different from a properly sealed one.
The Band
The screw band, sometimes called a ring, does not seal anything. Its entire job during processing is to hold the flat lid in position against the jar rim while the seal forms. Once the jar has cooled and you've confirmed the seal, the band's job is done.
Bands are reusable as long as they are in good condition. Check them before each canning session: rust, dents, or a warped edge mean the band should be retired. A warped band can't apply even pressure, and a rusty band can be nearly impossible to remove after processing.
How the Seal Actually Forms
Understanding the physics here makes the rest of the rules make sense.
When you fill a hot jar and place it in a canner, air is still present in the headspace above the food. During processing (either in a boiling water bath or a pressure canner, depending on the food), that air expands and some of it escapes past the slightly flexible lid. The heat also softens the sealing compound so it can press tightly against the glass.
When processing ends and the jar begins to cool, the air and steam trapped in the headspace contract. That contraction creates a partial vacuum inside the jar. The difference in pressure between the inside and the outside pushes the lid inward. The sealing compound, now firming back up as it cools, locks into that concave position.
That characteristic "pop" you hear from the counter is the moment the lid gets pulled down into its sealed position. A properly sealed lid will be concave, dipped slightly toward the center, and will not flex up and down when pressed. If it springs back, the jar did not seal.
For more on what equipment you'll need to complete this process safely, see our guide to canning equipment for beginners.
Fingertip Tight: Why You Don't Crank the Band Down
"Fingertip tight" is one of those canning phrases that sounds vague until you understand what it's doing.
When you screw the band down over the flat lid, you want it snug but not cranked. The right amount of resistance is roughly what you'd apply using just your fingertips, not your whole palm. If you cinch it down hard, air cannot escape from inside the jar during processing. That trapped air interferes with vacuum formation and can result in a failed seal. In extreme cases, overtightening can also buckle the lid or push food up against the sealing compound, which contaminates it.
Fingertip tight means the lid is held flat against the rim and will not shift during processing, but the band is loose enough that air can still vent past it. Think of it as secure, not sealed.
Removing Bands After the Jars Cool
Once your jars have cooled completely (typically 12 to 24 hours after processing), remove the screw bands before storing. This step surprises a lot of beginners. Leaving bands on can cause two problems.
First, any moisture trapped under the band will cause rust over time, and rust can fuse the band to the jar or flake onto the lid. Second, a band can hold a failed seal in place. If the flat lid didn't seal properly but the band is still on, the lid may appear sealed when it isn't. Removing bands lets you confirm the seal by feel and keeps failed jars from masquerading as good ones.
After removing the bands, wipe the outside of the lid dry, then store in a cool, dark location. Bands can be washed, dried thoroughly, and saved for the next batch — as long as they're still in good condition.
For guidance on choosing the right jar for different recipes, see mason jar sizes explained.
Lid vs. Band: A Side-by-Side Comparison
| Feature | Flat Lid | Screw Band |
|---|---|---|
| Primary function | Creates the airtight seal | Holds lid in place during processing |
| Reusable? | No, single use only | Yes, if undamaged |
| What to check before use | No dents, compound intact | No rust, no warping, opens smoothly |
| What to look for after processing | Concave center, no flex | Can be removed and washed |
| When to discard | After every use | When rusted, bent, or hard to remove |
| Role in sealing | Forms vacuum seal via compound | None; seal is independent of band |
A Note on Reusable Lid Systems
Two-piece metal lids are not the only option. Reusable systems, including silicone-gasketed glass lids and certain European-style latch closures, have dedicated followings among canners who want to reduce waste. Some of these are well-designed and effective.
The critical point: any alternative lid system must be used according to its own tested instructions, from a reputable source. Do not assume that a lid designed for storage will also work for pressure canning or water-bath canning. If the manufacturer hasn't published tested processing guidance, treat the product as a storage tool only.
The standard two-piece system remains the most widely tested and documented option for home canning in North America. When in doubt, it's the safest default.
Common Mistakes Worth Knowing
A few errors come up repeatedly among beginners, and most of them involve the lid:
- Reusing flat lids from a previous batch. Even if the lid looks fine and the compound feels intact, it has already been compressed and heat-stressed. It may seal on the counter but fail in storage.
- Food on the jar rim. Any residue (oil, fruit pulp, syrup) between the jar rim and the sealing compound can break the seal. Wipe jar rims with a clean damp cloth before placing lids.
- Overtightening the band. More pressure is not more security. Cranking the band down prevents venting and can cause seal failures or buckled lids.
- Leaving bands on during storage. This traps moisture and can mask a failed seal.
- Using old or stored lids past their best-by date. The sealing compound degrades over time. Most manufacturers recommend using lids within one to two years of purchase and storing them in a cool, dry location.
FAQ
Can I reuse canning lids if they sealed perfectly last time?
No. A lid that sealed successfully has already done its job: the sealing compound was compressed and shaped to one jar rim under heat. The USDA and the National Center for Home Food Preservation recommend new flat lids for every canning batch. The risk of a failed seal from a reused lid is not worth the small savings.
Do the screw bands actually help create the seal?
The bands hold the flat lid in place during processing, but they don't create the seal themselves. The seal forms from the sealing compound and the vacuum that develops as the jar cools. You could remove the band immediately after the jar cools and the seal would remain intact, which is exactly what you should do before storing.
What does "fingertip tight" mean in practice?
Screw the band down using your fingertips only, no palm pressure, no tools. You want the band snug enough that it won't shift or spin during processing, but loose enough that air can still escape from inside the jar. If you've over-tightened it, you'll know at processing time because the lid may buckle or fail to seal.
My lid didn't pop. Did the jar fail to seal?
Not necessarily. The audible "pop" isn't universal. Check the seal by pressing the center of the lid after the jar has fully cooled. A sealed lid will be concave and rigid and won't flex. If it springs back up when pressed, the jar didn't seal and the contents should be refrigerated and used promptly.
Can I use any two-piece lid for pressure canning?
Standard two-piece metal lids rated for home canning are appropriate for both water-bath and pressure canning. What matters is that lids are new, undamaged, and labeled for home canning use. Always follow current tested recipes from a trusted source. The USDA Complete Guide to Home Canning and the National Center for Home Food Preservation are both free online. For a primer on when pressure canning is required, see our guide to pressure canners vs. pressure cookers.