How to Make and Can Jam (A Beginner's Guide)
Learn how to make jam for canning step by step. Beginner-friendly guidance on pectin, gel point, headspace, and safe water-bath processing for your first batch.
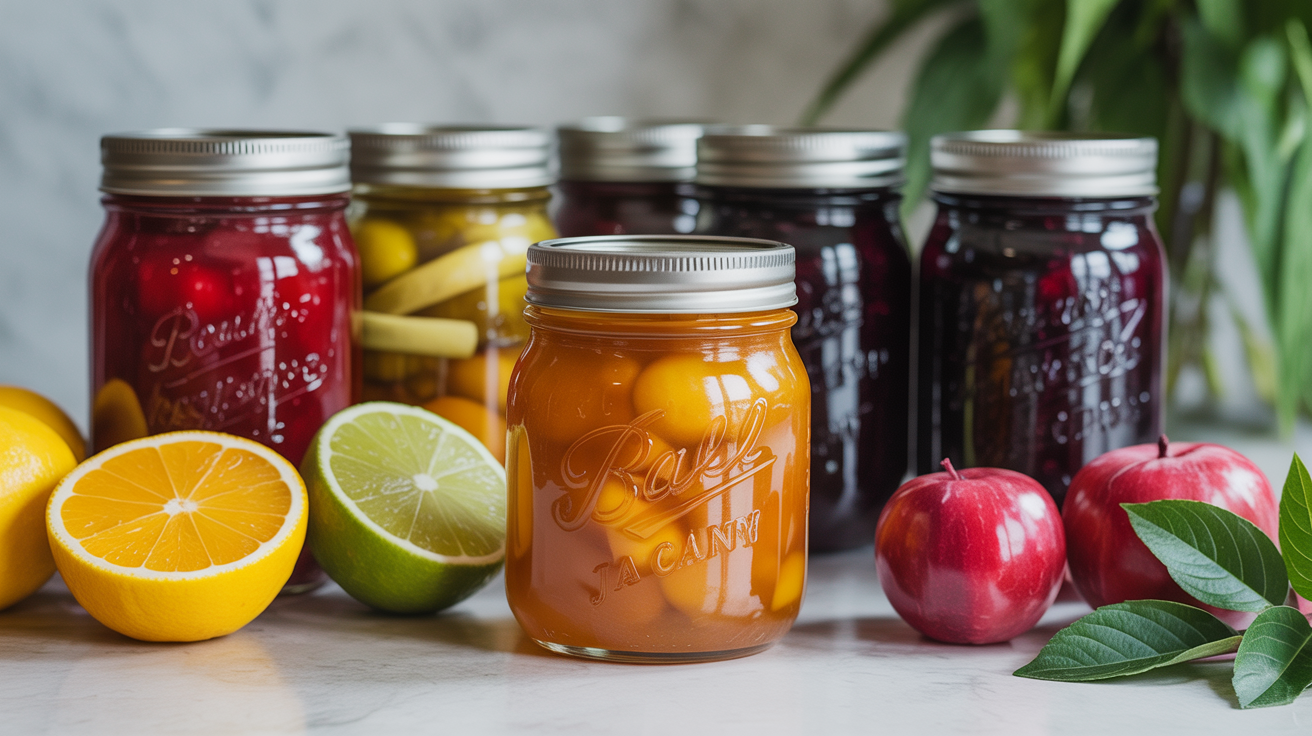
Jam is where most home canners start, and for good reason. The process is forgiving, the results are immediate, and a pantry shelf lined with jewel-bright jars of strawberry or peach jam feels genuinely rewarding. If you have never canned anything before, jam is the friendliest first project. It uses a water-bath canner (no pressure canner needed), requires only a handful of ingredients, and teaches you nearly every skill you will use for years to come.
This guide walks you through the full process, from choosing your fruit to checking your seals the next morning. One important note before you begin: for actual quantities of fruit, sugar, and pectin, and for the exact processing time your jar size and altitude require, always use a current tested recipe from a trusted source such as the National Center for Home Food Preservation, the USDA Complete Guide to Home Canning, or the Ball Blue Book. The ratios in tested recipes exist to protect you, and this is one place where improvising can backfire.
Why Jam Is Perfect for Beginners
High-acid foods are the safe starting point for home canning. Fruit has enough natural acidity (pH 4.6 or below) that harmful bacteria (including Clostridium botulinum, the organism behind botulism) cannot survive the water-bath process. That is why jam, jelly, and most fruit preserves are water-bath candidates while vegetables, beans, and meat are not.
Jam is also fast. A small batch of strawberry jam can move from whole berries to sealed jars in under two hours on a weekend morning. You do not need a massive kitchen or special equipment beyond what most home cooks already own. A heavy-bottomed pot, a canning funnel, a jar lifter, and a water-bath canner (or a deep stockpot with a rack) cover the basics.
The other reason jam works so well for beginners: you can see and feel the process working. The jam thickens as it cooks, the bubble pattern changes, and when you drop a spoonful onto a chilled plate you can watch it gel before your eyes. That tangible feedback builds confidence fast.
Equipment You Will Need
Gather everything before you start. Once the jam is cooking it moves quickly, and hunting for a funnel with a pot of boiling fruit on the stove is no fun.
- Water-bath canner or deep stockpot with a rack. Jars need at least 1 inch of water above their lids. A true canning rack keeps jars off the bottom and lets water circulate; a folded kitchen towel works in a pinch for small batches.
- Mason-style canning jars in half-pint (8 oz) or pint (16 oz) sizes. Check for chips and cracks along the rim; even a tiny nick can prevent a seal.
- New lids every time. Bands can be reused if they are rust-free, but the flat lids with the sealing compound should always be new. Old lids are the number-one cause of seal failures.
- Jar lifter. Non-negotiable. Hot jars from a water bath are genuinely dangerous to handle without one.
- Wide-mouth canning funnel. Keeps jam off the jar rims, which matters for a clean seal.
- Instant-read thermometer or a chilled plate for testing the gel point.
- Large, heavy-bottomed pot for cooking the jam. Jam at a full rolling boil will double in volume, so use a bigger pot than you think you need.
The Step-by-Step Process for Canning Jam
These steps cover the general method. Before you begin, select a tested recipe and read it all the way through. The recipe will give you the quantities and processing time specific to your fruit.
-
Prepare your jars. Wash jars, bands, and lids in hot soapy water. Keep jars hot until you fill them: either in a low oven (200°F), a simmering pot of water, or the dishwasher on the heated-dry cycle. Cold jars can crack when hot jam hits them.
-
Fill your water-bath canner. Set the rack in the canner, add water, and bring it to a simmer while you make the jam. You want it ready to go the moment your jars are filled.
-
Prep your fruit. Hull, pit, peel, or chop according to your recipe. Measure by weight or by cup exactly as specified, since this affects the final sugar-to-acid-to-pectin ratio.
-
Combine fruit, pectin, and (if applicable) lemon juice. Most tested recipes call for commercial pectin added to the fruit before the sugar. See the section below on why pectin matters. Stir to dissolve.
-
Bring to a full rolling boil. A full rolling boil cannot be stirred down. Stir constantly at this stage to prevent scorching.
-
Add sugar all at once and return to a full rolling boil. Most recipes specify measured sugar added in a single addition. Stir constantly once the sugar goes in.
-
Boil for exactly the time your recipe specifies (often 1 minute for recipes using commercial pectin). Set a timer.
-
Test for gel point (see the section below). Skim any foam from the surface with a metal spoon. Foam does not affect safety but can make the finished jam look cloudy.
-
Ladle jam into hot jars, leaving the correct headspace. Most jam recipes call for 1/4 inch of headspace. Use your canning funnel and wipe the rims clean with a damp cloth immediately after filling.
-
Apply lids and bands. Fingertip tight only, meaning snug but not clamped down with full hand strength. Air needs to escape during processing to create the vacuum seal.
-
Lower jars into the canner. Make sure they are covered by at least 1 inch of boiling water. Put the lid on the canner.
-
Process for the time your recipe specifies, adjusted for altitude. Start your timer when the water returns to a full boil. Do not start the clock during the ramp-up. Higher altitudes require longer processing times; your recipe or the NCHFP website will tell you exactly how much to add.
-
Turn off heat and let jars rest in the canner for 5 minutes. Then remove them with a jar lifter, keeping them upright. Set on a towel with space between jars. Do not tilt.
-
Cool for 12 to 24 hours undisturbed. You will hear lids "ping" as they seal, which is one of the best sounds in the kitchen.
-
Check seals. Press the center of each lid. A sealed lid curves slightly downward and does not flex. If a lid flexes or pops back, that jar did not seal. Refrigerate it and use it within a few weeks.
How to Test for Gel Point
Getting jam to set is the skill that separates firm, sliceable jam from sugary syrup. There are three classic methods:
The plate test: Before you start cooking, place two or three small plates in the freezer. When you think the jam might be ready, drop a teaspoon onto a frozen plate and wait 30 seconds. Push the drop with your finger. If it wrinkles and holds its shape, it is set. If it runs, cook another minute and test again.
The sheet test: Dip a cold metal spoon into the boiling jam and hold it horizontally above the pot. If the jam sheets off the spoon in a wide, slow sheet rather than dripping in individual drops, it has reached the gel point.
The thermometer test: Jam sets at 220°F at sea level. At higher altitudes, subtract 2°F for every 1,000 feet of elevation. At 3,000 feet your target is 214°F.
Understanding Pectin and Acid
Pectin is the natural carbohydrate that makes jam gel. It occurs naturally in fruit (especially in the skins, seeds, and cores) but in varying amounts. Apples, citrus, and underripe fruit are naturally pectin-rich. Strawberries, peaches, and sweet cherries are pectin-lean and nearly always need commercial pectin added to set properly.
Commercial pectin comes in liquid and powder forms, and they are not interchangeable in a recipe. Always use the type your tested recipe specifies. For a deeper look at how pectin creates that satisfying gel, see our guide to how pectin works and why it matters for a good set.
Acid plays an equal role. Lemon juice is added to many recipes not just for flavor but because it activates pectin and helps create the gel. It also helps preserve color and, importantly, contributes to the overall acidity that makes water-bath canning safe for fruit spreads. Do not omit it if your recipe calls for it.
Refrigerator Jam: The No-Canning Option
If you want to start even simpler, or if your first batch does not set as firmly as you hoped, refrigerator jam is a no-pressure alternative. You follow the same cooking process but skip the water-bath entirely: pour the hot jam into clean jars, let it cool, and refrigerate. It keeps for three to four weeks in the fridge, or you can freeze it for up to a year in freezer-safe containers.
Refrigerator jam is also a good testing ground for recipes you are not sure about. Cook a small batch, chill it, taste it, and adjust the recipe before committing to a full canning run. No pressure, no timing, no altitude calculations. Just fruit and sugar and a good result.
Common Beginner Mistakes and How to Avoid Them
Reducing the sugar. It is tempting to cut back on sugar in a tested recipe, but sugar is not just a sweetener here. It binds with pectin to create the gel, draws water out of the fruit, and acts as a preservative. Changing the ratio can result in jam that will not set and may not keep safely. If you want low-sugar jam, use a pectin specifically formulated for it (look for "low-sugar" or "no-sugar" pectin on the label) and follow a recipe designed for that product.
Not sterilizing jars properly. Jars processed for 10 minutes or more in a water bath do not need to be pre-sterilized; the processing time handles it. But jars still need to be hot when you fill them. Cold jars can crack and can also cause the temperature of the jam to drop unevenly, affecting the set.
Skipping the rim wipe. A single drop of jam on the jar rim can prevent a seal. Wipe with a clean, damp cloth every single time before applying the lid.
Guessing at altitude. Processing times in tested recipes assume sea level. If you live above 1,000 feet and do not adjust, you may under-process your jars. The NCHFP website has a clear altitude adjustment table; look it up before your first batch.
If you are curious how jam differs from jelly and preserves, we have a breakdown in our post on jam vs. jelly vs. preserves.
FAQ
Can I use frozen fruit to make jam for canning?
Yes. Frozen fruit works well, especially for berries and peaches that are only available part of the year. Thaw the fruit completely and drain off excess liquid before measuring, or the jam may be too loose. Follow a tested recipe that specifies the fruit quantity by weight or cup measurement rather than by piece count.
How long does home-canned jam last?
Properly sealed and stored in a cool, dark place, home-canned jam is best within 12 to 18 months. Color, flavor, and texture all start to decline after that, even if the jar is still technically sealed. Always check the seal before opening a stored jar: the lid should be concave and firm, with no flex.
What happens if my jam does not set?
A soft set is common for first-timers. You have a few options: accept it as a soft-set jam (perfectly safe and delicious on yogurt or pancakes), reprocess it within 24 hours using the directions in the NCHFP's guide to "How Do I Fix My Jam," or store it in the refrigerator and enjoy it as-is. Reboiling jam to try to improve the set can affect flavor and is tricky to get right, so weigh whether it is worth the effort.
Do I need special jars for canning jam?
Use jars specifically designed for home canning: Mason-type jars with two-piece lids. Do not reuse commercial jars from store-bought salsa, pasta sauce, or jam. Those jars are not designed for the thermal stress of home canning, and their lids do not have the sealing compound that creates a reliable vacuum seal.
Can I add different spices or flavors to a tested jam recipe?
Small amounts of spices (a cinnamon stick, a split vanilla bean, a pinch of cardamom) are generally considered safe additions because they do not significantly affect the acidity or density of the jam. However, adding large amounts of low-acid ingredients (like extra fruit or vegetables) changes the recipe and can affect both the set and the safety of the final product. Stick close to tested recipes and save your creative experiments for refrigerator jam until you have a feel for how the process works.
Jam is the best proof that home canning does not have to be complicated. The method is repeatable, the results are obvious, and the skills carry over to everything else you will make. Once you have a few batches under your belt, the whole world of pickles, preserves, and fruit butters opens up. If you are ready to try something beyond fruit spreads, our guide to brining basics for canned pickles is a good next step.