Venting, Pressurizing, and Cooling a Pressure Canner Safely
Learn how to vent a pressure canner, build and hold pressure correctly, and cool it safely with this step-by-step guide for beginners.
Getting to pressure is only part of what a pressure canner does. Before the gauge climbs, before the timer starts, and after processing ends, there are specific steps that determine whether the food inside is actually safe. Skipping or rushing any one of them can throw off the entire run. This guide walks through the full sequence: venting steam before pressurizing, watching pressure during processing, and depressurizing safely at the end.
Why Venting Matters Before You Pressurize
Many beginners assume the canner is ready to seal up and pressurize the moment water begins boiling. It is not.
Air trapped inside the canner is the core problem. A pressure canner works by raising the temperature of steam above the boiling point of water, and that elevated temperature is what destroys the bacteria responsible for botulism in low-acid foods. But air and steam do not behave the same way. At any given pressure reading, a canner containing a mixture of air and steam will be cooler than one containing pure steam. The gauge can show the correct PSI while the actual temperature inside falls short of what the tested recipe requires.
Venting the canner for a sustained period before closing the vent drives that trapped air out and replaces it with pure steam. After that, the relationship between pressure and temperature is reliable again.
Your canner's instruction manual specifies the exact venting duration required for your model. Some manufacturers specify ten minutes of continuous, steady steam; others differ. Follow your manual. If you no longer have it, contact the manufacturer or check the National Center for Home Food Preservation (NCHFP) for guidance specific to your canner type.
The Full Pressure Canner Step Sequence
The steps below describe the general flow. Actual venting times, pressure targets, and processing durations must come from your canner's manual and a tested USDA, NCHFP, or Ball recipe, not from general descriptions.
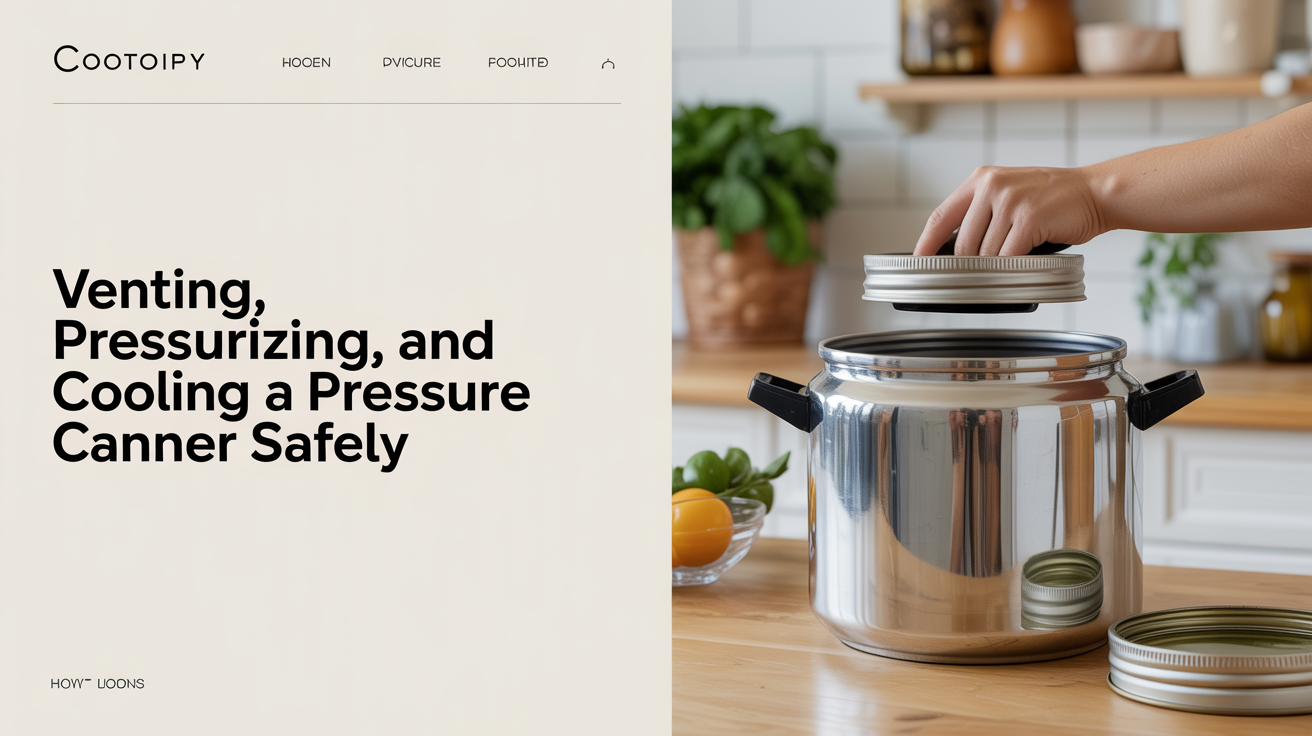
- Prepare the canner. Add the amount of water specified in your manual to the canner pot. Place the rack inside, then load your filled, lidded jars onto the rack.
- Seal the lid. Lock the lid according to your canner's design. Leave the vent pipe open (weighted gauge canners) or the petcock open (dial gauge canners).
- Heat on medium-high. Bring the water to a boil until a steady, vigorous column of steam flows continuously from the vent.
- Vent for the required time. Let that steam flow without interruption for the period your manual specifies. Do not time this loosely, watch the clock.
- Close the vent. Place the counterweight or close the petcock per your model's instructions.
- Let pressure build. The pressure will climb on its own. Watch the gauge or listen for the weight to begin rocking.
- Start the timer only when correct pressure is reached. This is the step beginners most often get wrong. The timer does not start when the vent closes or when the flame is adjusted; it starts the moment the gauge reads the pressure required by your recipe.
- Maintain pressure steadily. Adjust the heat to hold pressure at or just above the target. Pressure that bounces up and down is not the same as steady pressure, and some tested recipes assume a stable hold.
- When processing time is complete, turn off the heat. Remove the canner from the burner if you are on an electric stove.
- Let the canner depressurize naturally. Do not rush it.
Holding Pressure During Processing
Once the timer is running, your main job is keeping pressure stable. This sounds simple but requires attention, especially on electric stoves where the burner holds heat longer than gas.
If pressure drops below the required level during processing, some sources recommend bringing it back up and restarting the timer from zero. Check the guidance in your manual or with the NCHFP, because the answer can depend on how far pressure dropped and for how long. The safest habit is to stay nearby and make small heat adjustments rather than walking away and returning to a canner that has dropped pressure.
If pressure climbs too high, reduce heat slightly. A canner running well above the required pressure is not more effective; it can cause liquid to siphon out of jars, which can compromise the seal.
Altitude also affects the pressure you need to use. Dial gauge canners and weighted gauge canners handle altitude differently. If you are canning above 1,000 feet, confirm the correct pressure adjustment with your tested recipe or the NCHFP guidelines before you start.
Cooling Down a Pressure Canner Safely
After the heat is off, the canner needs time to return to zero pressure on its own. This is not a suggestion; it is a safety requirement.
Opening a canner that is still under pressure, or cooling it artificially to speed the process, can cause serious injury. Never run cool water over the canner, never place it in a cold bath, and never try to force the lid open before the pressure indicator shows zero and the lid lock (on modern canners) has released.
How long natural depressurization takes depends on the size of the canner and the number of jars inside. Smaller canners with fewer jars cool faster. A large canner fully loaded may take 30 to 45 minutes or longer. Your manual will give you a realistic range.
Once pressure has returned to zero, wait an additional ten minutes before opening the lid. When you do open it, tilt the lid away from you to direct any residual steam away from your face.
Remove jars with a jar lifter and set them upright on a towel, spaced an inch or two apart. Do not tilt or tip the jars. Let them cool undisturbed for 12 to 24 hours before checking seals.
Checking Seals and Storing Your Jars
A properly sealed lid will be concave and will not flex when you press the center. Any lid that pops up and down, or that you can push down and spring back up, has not sealed.
Unsealed jars can be refrigerated and used within a few days, or reprocessed within 24 hours with a new lid if the food and jar are still in good condition. Never store an unsealed jar at room temperature as shelf-stable.
For anything you are uncertain about, the rule that applies to all home canning applies here too: when in doubt, throw it out.
For more on pressure canning from the beginning, see How to Pressure Can: A Beginner's Step-by-Step Guide. If you want to understand why water-bath canning cannot replace pressure canning for certain foods, Why You Can't Water-Bath Can Low-Acid Foods covers the science. For applying these steps to specific produce, How to Pressure Can Vegetables walks through a full vegetable run.
Frequently Asked Questions
How long do I vent a pressure canner before closing the vent? Your canner's instruction manual specifies this. Many canners require ten minutes of steady, continuous steam, but the exact time varies by model and design. Always use the number in your manual rather than a general estimate.
Can I start the timer as soon as I close the vent? No. The timer starts when the canner reaches the correct pressure specified in your tested recipe, not when the vent is closed. It takes several minutes for pressure to climb after the vent closes, and processing time only counts once the target pressure is reached and holding.
What if the pressure drops below the required level during processing? Consult your canner manual and the NCHFP for guidance. Many sources recommend bringing pressure back to the correct level and restarting the processing time from zero. The safest approach is to prevent drops by staying nearby and making small heat adjustments throughout the process.
Why can't I run cold water over the canner to cool it faster? Force-cooling a pressure canner can cause rapid pressure changes that may break seals or compromise jar integrity, and opening a canner that still has pressure is a safety hazard. Natural depressurization is part of the process, not a waiting game to be shortened.
My canner gauge reads zero but the lid feels stuck. Is it safe to open? Modern canners with locking lids will not allow the lid to open until pressure has fully dissipated and the lock releases. If the lid resists, wait longer. Never force a lid open on a pressure canner.